


Setting up TP-Link router(FTTP)
In this guide we will look at connecting a TP-Link router to your Swift Ultrafast full-fibre FTTP service. The actual TP-Link control panel may look different to what is described but the procedure should be roughly the same.
After installation you will have an ONT or Optical Network Terminal mounted on the wall which converts the fibre to ethernet. Connect this to the yellow LAN4/WAN port on the back of TP-Link with an ethernet patch cable.
Connect to the router using wifi or using an ethernet cable to one of the TP-Link’s LAN ports and wait for an IP address to be assigned by the router, then access the router’s web admin page. This by default will be https://192.168.1.1 on TP-Link routers.
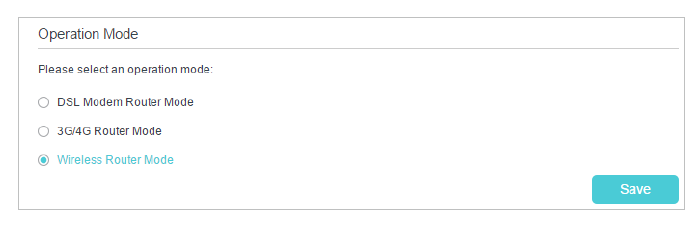
If changing from standard ADSL/FTTC then you will first need to change the router mode. Go to Advanced > Operation Mode, select the Wireless Router Mode, and click Save. The modem router will reboot.
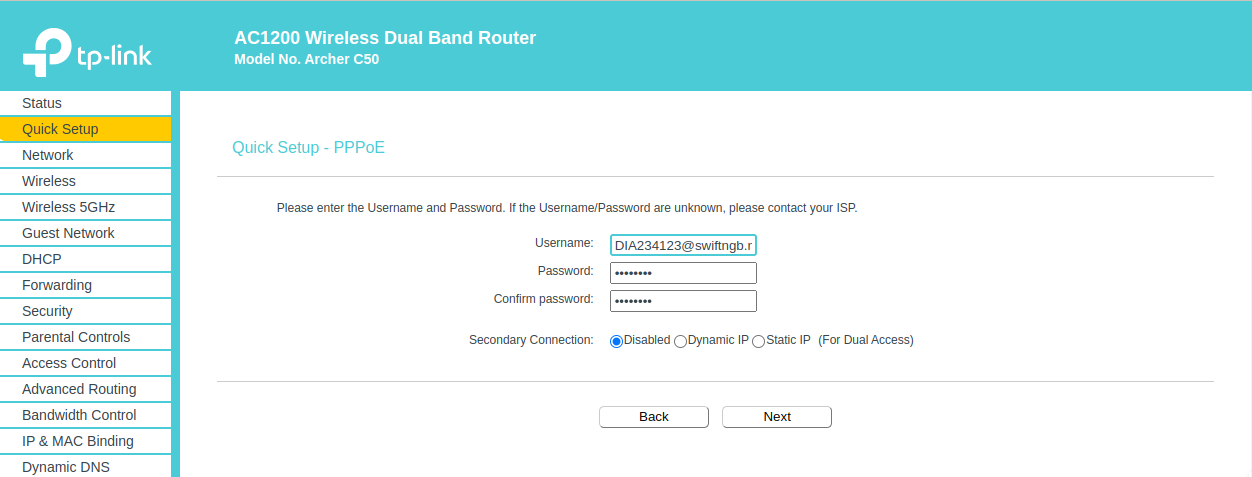
You now need to go to Quick Setup, select the connection type as PPPoE and enter the username and password supplied by Swift.
Congratulations you should now be connected to Swift Ultrafast full-fibre!