
How Can We Help?
Installing LiteSpeed Cache for Litespeed WordPress Packages
After ordering a Swift Litespeed WordPress hosting package you will enjoy many of the benefits of the Litespeed web server but to really leverage it’s power you will also need to install the Litespeed cache plugin which communicates with Swift’s LiteSpeed Web Server and LSWS’s built-in page cache to dramatically reduce page load times.
With advanced cache-management tools and optimisation features, the LiteSpeed Cache for WordPress is an all-in-one site acceleration solution and the only optimisation plugin you will ever need!
Installation:
- Login to your WordPress admin panel.
- If you already have a cache plugin installed, disable/remove it.
- On the left, click the ‘Plug-ins’ menu item and then click ‘Add New’.
- At the top right you will find a ‘Search plug-ins…’ box, type ‘LiteSpeed Cache’ then press Enter.
- Select ‘Install Now’ under the LiteSpeed Cache box.
- Once the installation has completed, click “Plugins” and click ‘Activate’.
Configuration:
- Login to your WordPress admin panel
- On the left, click ‘LiteSpeed Cache’, then select ‘Cache’ on the left.
- Ensure ‘Enable cache’ is ‘ON’.
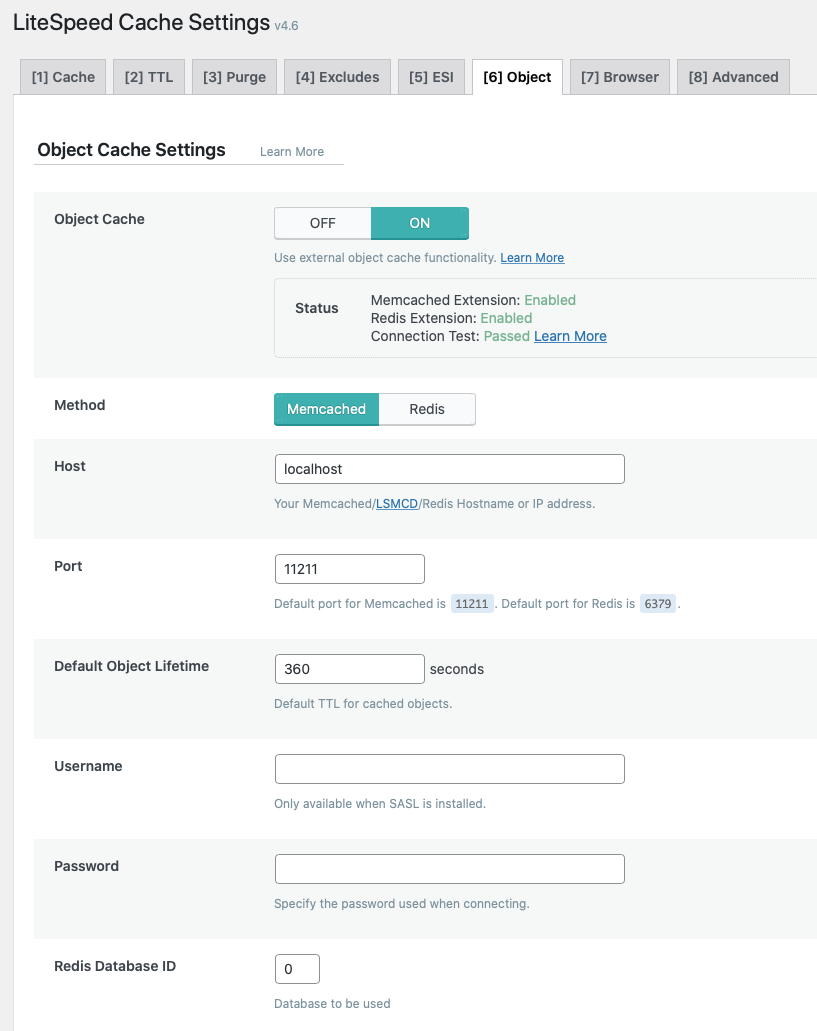
- Select the ‘Object’ tab and ensure the object cache is ‘ON’ and settings are as follows:
- Click Save ‘Changes’ and you’re all done.